
Let’s assume you’re having a really bad day in which your right hand has been injured or wounded, your revolver is empty, and you desperately need to reload it using the only hand you have remaining. We won’t talk about the “dominant and non-dominant” hand here; since the cylinder comes out on the left side of the revolver, each hand must adapt with separate techniques. See my previously published “Revolver Reloads Part 4: Right Hand Only” article.
As with most reloads, in an ideal world, you’ll get behind cover to perform this complicated technique if you need to employ it “for real.”
Safety
These techniques should be practiced extensively with dummy rounds or snap caps before being attempted with live ammunition. Ideally, it should be done with instructor or safety officer supervision.
Step-By-Step
Pull the revolver back and touch the backstrap of the grip frame to the left side of your chest. This will stabilize your grasp. Slide your hand into a position where the bottom of the trigger guard is centered in the hollow of the palm of your left hand. You’re now in position for your left thumb to activate the cylinder release latch while the fingertips push the cylinder out into the open position.
Leaving the fingers in that position – reaching through the open window of the frame and holding the cylinder out – turn the muzzle up so gravity can work for you and minimize the chance of a cartridge rim getting caught under the ejector star. Use your thumb to push the ejector rod with a single purposeful stroke, the so-called “FBI ejection technique,” and punch the spent casings out.
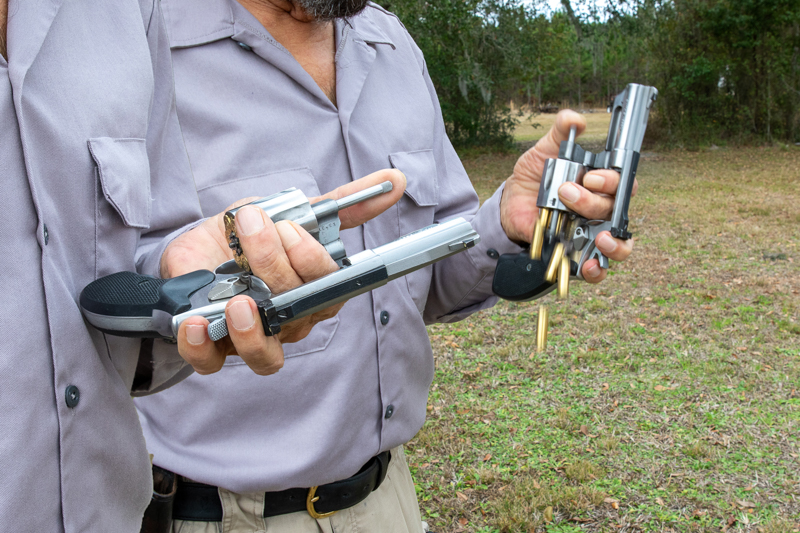
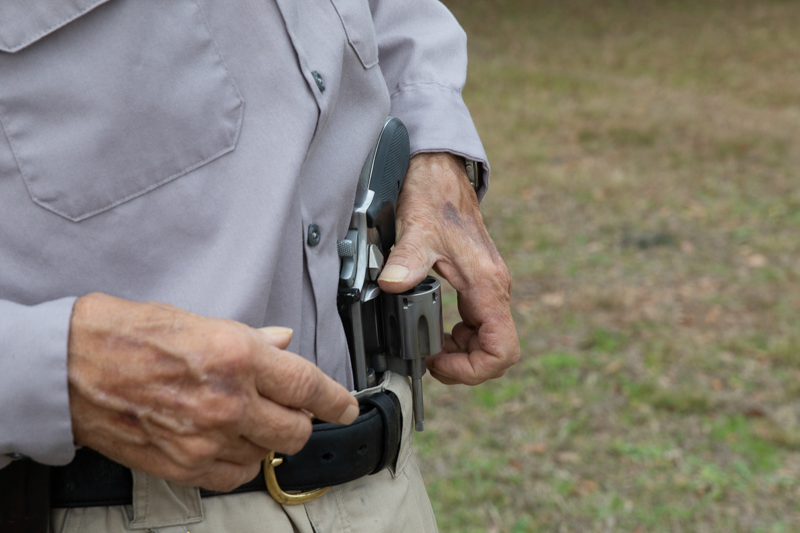
Now, bring the thumb to the back of the cylinder and press the ejector star firmly to keep it in place, as seen in the uncaptioned lead photo here. Thrust the barrel of the gun into the left front of the waistband with the open cylinder and ejector rod hanging out in front of the belt. The thumb on the star will keep the belt from pushing up the ejector star and preventing full seating of cartridges.
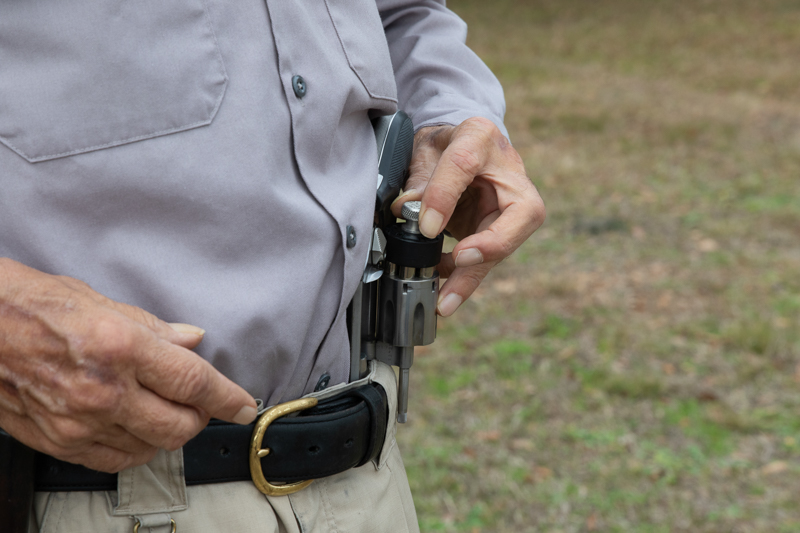
Grasp the speedloader with fingertips in front of the bullet noses and guide the cartridges into the cylinder. With moon clips, the job is done right there. With speedloaders, we have to activate the release. Further, with a straight-push-release design, such as the Safariland series or the JetLoader, just a push should drop the rounds into the chambers. With a turning knob release, such as the HKS or the Five-Star loader, turning the knob will turn the cylinder without releasing the rounds, so you have to stabilize it. I’ve found the easiest way is to put my ring finger in one of the cylinder flutes. Now thumb and forefinger turn the knob, releasing the payload into the cylinder.
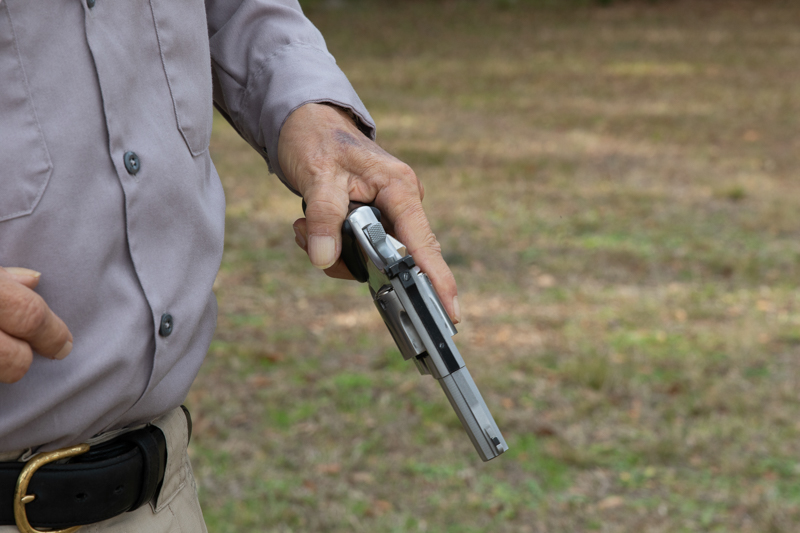
Let the now-empty speedloader fall away. Take a firing grasp on the grip with the trigger finger straight, lift the gun out of the waistband, and use that index finger to close the cylinder. (Don’t close it as you swing it up, or a round may start to back out of its chamber, which will block cylinder closure.) Close the cylinder and then bring the muzzle up on target, and you’re ready to go back to work.
Other Considerations
Most people are right-handed, meaning that if they have injured their right arm before they can draw, right-handed shooters need to have practiced using their left hand to get the gun out of the right-handed holster. Weak hand draws from strong-side holsters are something we can discuss in another article.
The one-hand-only reload can be done from belt loops, pouches, or strips. Obviously, though, a speedloader will be advantageous. That is even more true for the one-hand-only techniques than it is when the shooter can use both hands.
The New York reload – dropping the empty gun and drawing a second, loaded one – is the fastest way to get back into action in these circumstances. It is generally a good idea to keep the second gun where the non-dominant hand can reach it easily in case the dominant hand is taken out of play.
The one-handed reload is relatively complicated. It needs lots of practice. The good news is that it can easily be practiced while watching TV or listening to music with dummy rounds. It’s a skill you’re unlikely to need… but one which, if you do need it, you will need it desperately.
Parting Thoughts
As with any reloading drill, practice makes perfect. Don’t just read this article and assume you’ll remember how to do this under stress. Instead, abide by the age-old rule of “practice, practice, practice.” Run the drill until it becomes second nature. In a real-world scenario, we rely on muscle memory as adrenaline takes over and our mind goes foggy.
Train and train often. Without proper training and practice, you’re more of a liability than an asset. Remember that.
The post Revolver Reloads Part 5: Left-Hand-Only appeared first on The Mag Life.
Read the full article here


