DIY PVC Target Stands: Cheap Stands for the Home Range
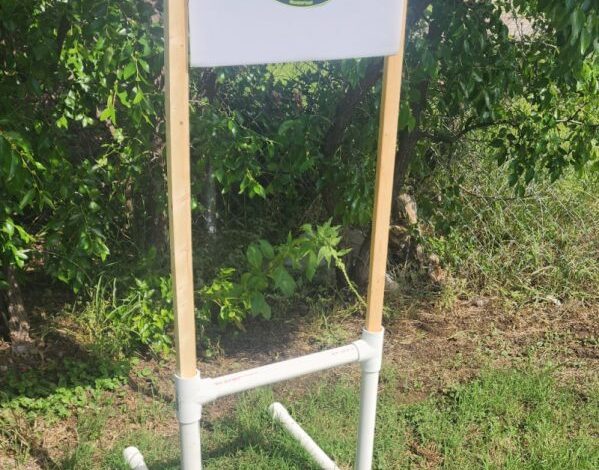
Needing to zero a rifle or get some trigger time but without a place to stick a target? We’ve all been there. Maybe the land you’re on is wide open and offers a safe backstop, but there’s just no range area set up quite yet. Or perhaps the range you’re visiting has a target that stands in total disarray and is basically unusable. Whatever the case, most of us have had a time when we needed a target stand, and there wasn’t one around. That’s where having a portable, do-it-yourself PVC target stand can be super handy.
PVC target stands can be tossed in the back of your truck, set up wherever they’re needed, and customized according to your needs. Best of all, building one is an affordable, straightforward project. We’ll walk you through the steps to build a PVC target stand. This DIY project is just a trip to the hardware store away.
What’s a PVC target stand?
PVC is a thermoplastic material known for being strong but lightweight. It’s hollow and used for things like plumbing and related construction work. It’s also great for outdoor activities like jug lines for catfish and, of course, making target stands. Part of what makes it so perfect for these projects is that it’s affordable and can last forever. The use of PVC makes them durable while remaining light and easy to move around. Plus, you can paint PVC and make your target stand look however you want. This target stand can be made according to the height you require and includes thin lengths of wood, called furring strips, for the portion that holds the targets.
What do you need to make a PVC target stand?
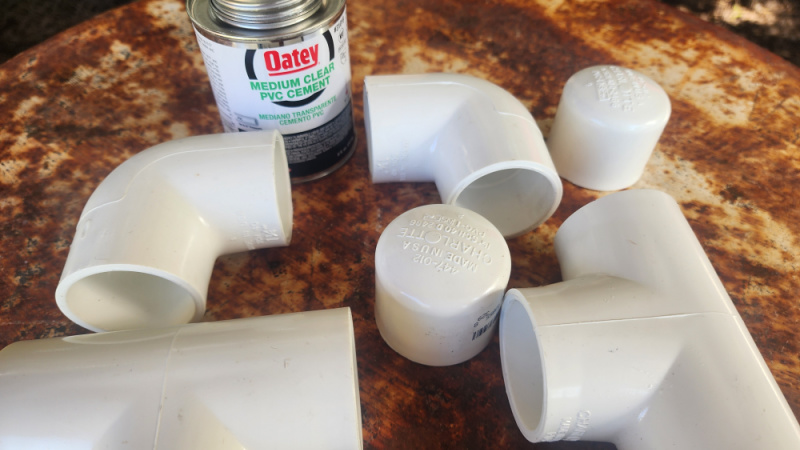
Odds are that you have the tools for this project, but you’ll likely need to hit your local hardware store for the rest. To build a target stand that includes a cross piece for added support and is the correct width for full-size targets, you need the following:
- (1) PVC pipe 10 feet in length with a diameter of 1.25 or 1.5 inches
- (1) PVC pipe 2 feet in length with the same diameter as the longer pipe
- (2) PVC 90-degree elbow connector
- (4) PVC Tee connector, unthreaded on all openings
- (2) PVC end cap (closed on one end, designed to fit over the open end of the pipe, not inside)
- (2) 1-inch by 2-inch by 8-foot furring strips
- (1) PVC cement (you’re fine with only cement and no primer in this case)
- Optional: Spray paint in your preferred color that’s made to adhere to plastic. Four PVC test caps if you’d like to permanently weigh the base of the stand. If you’re going to weigh down the base, you’ll need gravel, sand, or dirt to fill the pipes.
Tools required to build the PVC target stand:
- Measuring tape
- Painter’s or masking tape to more easily mark where to make cuts
- Cutting tool, which can be a Sawzall, PVC pipe cutter, or hacksaw
- Optional: Vise to secure pipe during cutting so it won’t slip
A note on spray paint: If you intend to paint your target stand, it’s a good idea to spray all the pieces before assembly. You can certainly spray paint the finished product, but it’s a bit messier and more likely to be uneven or unfinished in spots.
Step One: Measure and cut the pipe
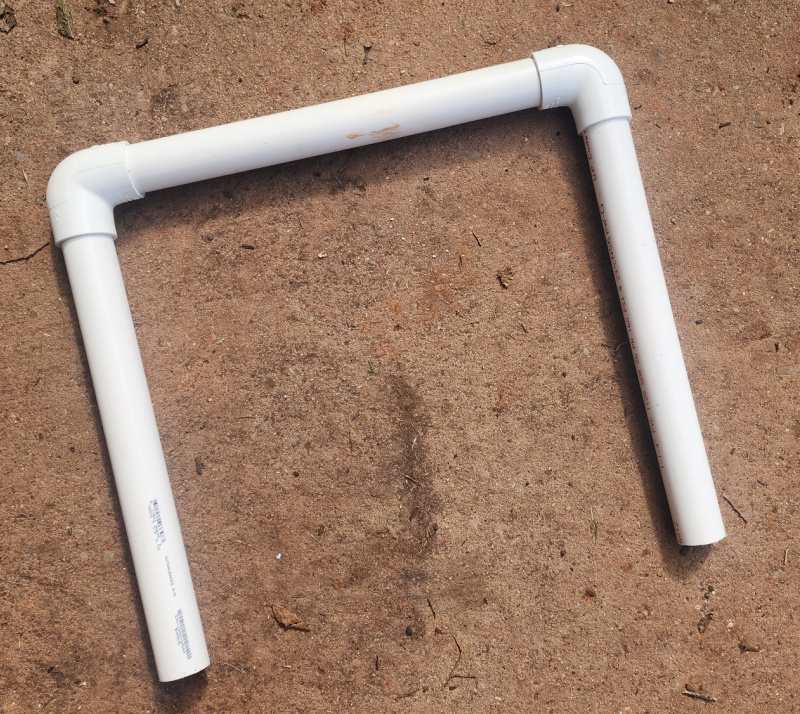
For this particular target stand, we’ll be cutting eight 16-inch pieces.
If you’re going to add gravel or dirt for weight in the base of the stand, this is the stage where you’d stop and do that. There are several ways to go about it. You could partially assemble the base, fill it, and add end caps or test caps to seal off one end of four pipes. Some shooters prefer all the weight to be in the forward portion of the base. Others want to separate it, so there will be two weighted pipes at the rearmost portion of the base, leaving the two forward pieces empty. If you plan to use weighted pipes, it’s a good idea for one weighted section to be at the front of the stand and another for the cross-piece. If you’re truly ambitious and won’t be moving the target much, you could fill the base with cement.
There are alternatives to filling the pipes, which tend to be preferable if you’re going to move the stand around a lot. You can use just about any heavy object to weigh down the legs of the assembled stand. That could include big rocks, sandbags, or really, anything heavy enough that won’t damage the pipes. Technically, you don’t have to weigh it down at all, but your stand is far more likely to remain upright if you use something to hold down the back of the base.
Step Two: Assemble the base
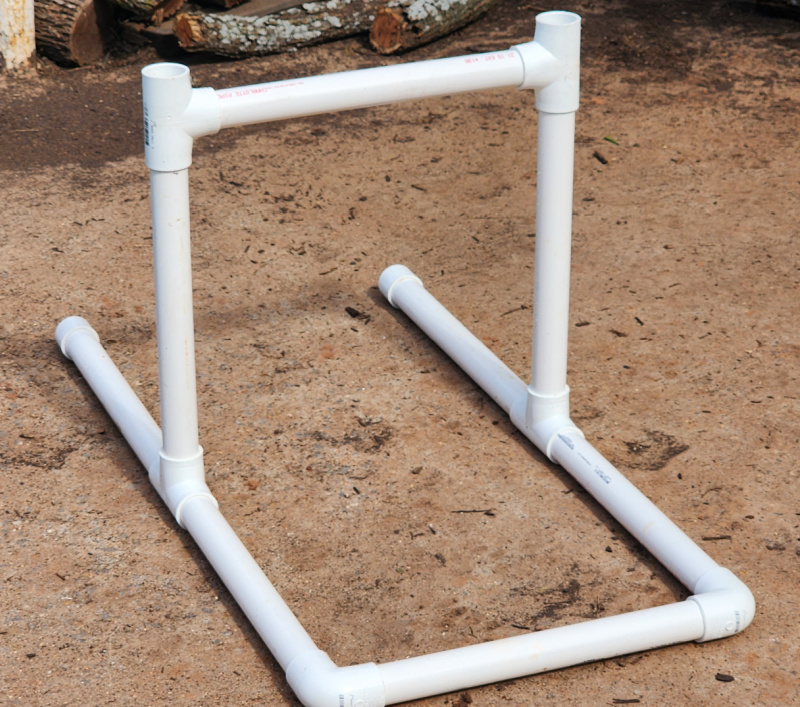
For the first part of this step, you need three lengths of pipe, two 90-degree connectors, and two end caps. You’re forming the base to look like three sides of a square. Do this by gluing the two 90-degree connectors onto either end of one length of pipe. Then, glue a pipe into the open end of both connectors. This gives you your square minus the back.
The second part of this step requires two “T” connectors, two more pipes, and two end caps. Cement the “T” connectors to the open ends of your base, then cement a length of pipe into the open back side of the connector (not the top). You extended the base to make it longer, turning your three-sided square into a three-sided rectangle. Finally, cement end caps onto the open end of the pipe at the back side of the base.
Step Three: Assemble the uprights and cross-section
With your open-ended rectangular base done, it’s time to add the upright arms and a cross piece for added stability.
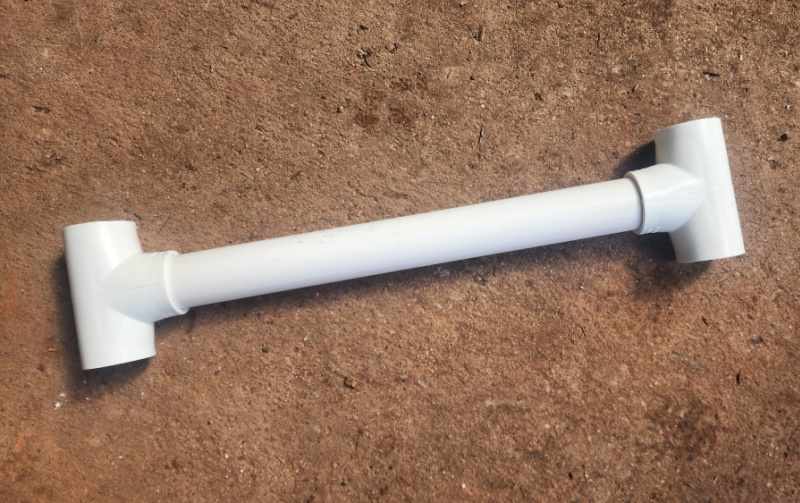
Glue a length of pipe into the topmost, open portion of the “T” connector on either side. Next, glue the final two “T” connectors to a single length of pipe. You’ll want to glue that pipe into the middle portion of the “T” piece, not one of the ends. This will leave you with two open ends of the “T” connector for a straight, open pass through to the upright arms (you’ll see why).
Take the cross piece and glue it onto the uprights. Leave the topmost portion of those two “T” connectors open.
Tip: If you don’t have a vehicle large enough to hold the base with the upright arms in place, don’t glue those uprights into the base. It’s possible to push the upright section into the base on-site and remove it for transportation.
Step Four: Add the furring strips
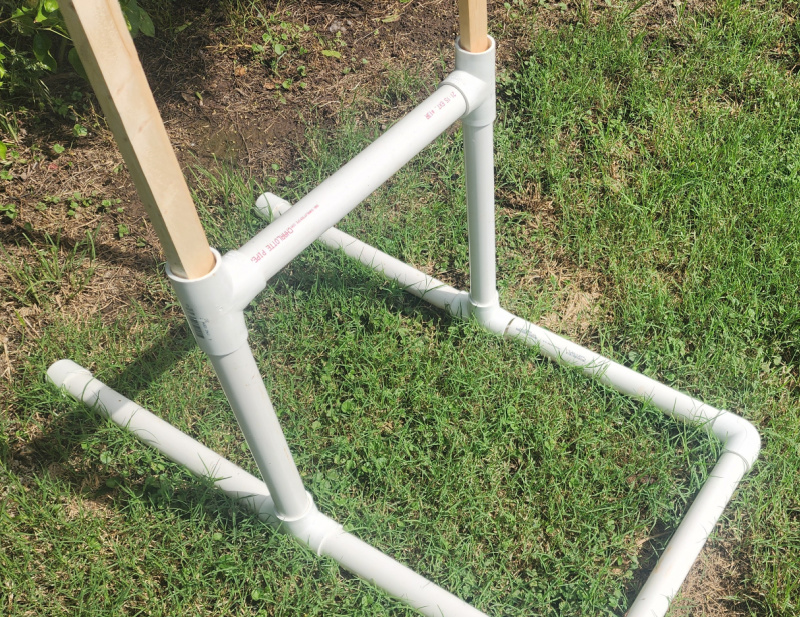
If you’re going to move the target stand around, you want to hold off on adding the furring strips until it’s ready for use. When you’re ready to use the stand and add a target, tap the furring strips into the open ends of the upright section. You can leave them at their eight-foot length for a taller frame or cut them down as needed.
Using the Stand
With the furring strips in place, you have a few options for target placement. You can staple a full-sized paper target, like an IPSC/USPA target, onto the strips. Another option would be to fasten corrugated cardboard to the furring strips and stick or staple smaller targets to that. We use furring strips instead of more PVC for the top of the frame because they’re cheap and easier to replace. When I made my first PVC target stand about 15 years ago, I used PVC for the entire thing. It took under five minutes for another shooter to obliterate the top of my frame with a shotgun. Take it from me: furring strips are cheap and easy to replace, while PVC is not nearly as cheap or simple.
There are practically endless variations to the ways you can make this target stand. Over the years, I’ve done it all, from creating a full, closed base to using PVC to extend the frame upward to a height of seven feet. This simpler target stand is the way to go for my time and money.
The post DIY PVC Target Stands: Cheap Stands for the Home Range appeared first on The Mag Life.
Read the full article here


