One of the consumables for shooting practice and training is silhouette targets, and while not the most expensive thing to buy – ammo is certainly worse – it’s also not something you can necessarily buy in most stores.
Not only that, but this is being written close to the holidays, and a lot of us are going to have a lot of extra cardboard hanging around. Want to save some money on training and practice and put that cardboard to better use?
Make DIY silhouette targets, and we’re going to walk through how.
What You Need For DIY Silhouette Targets
You’re going to need some supplies and tools, but the good news is you probably have almost everything you need already.
But first, you need to choose which silhouette target you’re going to make. The two most popular are the IPSC/USPSA silhouette and the IDPA silhouette. Both are good training targets, but the IPSC silhouette is used much more widely.
Once you’ve settled on one, buy two paper silhouette targets to use as templates. Cut the silhouette away from the white out of the first, and cut the C zone (if a USPSA/IPSC silhouette) or the -1 with the head attached from the second—more on why in a minute.
You’ll need a cutting instrument, such as a good pair of scissors, or a utility knife like a Xacto knife, box cutter, or carpet knife if you have one. Havalon knives and their Gerber clones also work well here.
You’ll need a supply of tape or thumbtacks to hold the template to the piece of cardboard.
Lastly, you’ll need some sort of straight edge that’s longer than a ruler, such as a yardstick or a carpenter’s square.
You’ll Get More C Zones Than Full Silhouettes, But That’s Not A Bad Thing
Having been making these for a while, one thing I can tell you is that you can get a lot more C-zones than full silhouettes just due to sheer dimensions.
The reason why is the size of most cardboard shipping boxes.
Here, for instance, is the size of a standard-size box from Walmart, which they print on the box.
You see, cardboard boxes are made out of panels. They get glued together and folded into the box shape.
For a full silhouette – either IDPA or IPSC – you need a cardboard box made of panels that fold down into sides that are at least 18″x30″, and frankly, most are not that big, such as the Walmart box above. However, a heck of a lot of cardboard boxes are made out of panels that are 12″x24″or larger, which is the same size as a USPSA/IPSC C zone (technically 11.81 inches wide and 23.63 inches tall) and the -1 zone of an IDPA target.
Having more C zone or -1 targets isn’t a bad thing. Sure, you miss your down threes and deltas, but a delta is just a mike with better PR.
Also, here’s something to think about: most of the bottle targets – such as the FBI Q target, the Rangemaster target, and so on – are around 12″x 24″ as well. Which, incidentally, is about the normal size of the human torso.
So sure…you don’t get as many full silhouettes, but it’s not like that means you can’t put in work.
Some might grumble that the scoring zones of handmade targets won’t be as exact or precise. They’d be right, but it’s like having the perfect arrangement of deck chairs on the Titanic. A 5.62-inch wide A zone (it’s actually 5.5 inches) is not going to give a D-class shooter GM-class scores.
How To Make Your DIY Silhouette Targets
Start by breaking down the cardboard box. Slit the flaps at the top and bottom so you have two flat halves, which will make the process easier. In the pictures, I’m cutting out a C zone from the Walmart box that I showed you earlier.
Spread your template over the cardboard, and then tape or pin it in place. Make sure to stretch it, taught, and the box is laying as flat as possible. Be sure to tape or pin the template so the silhouette does, too.
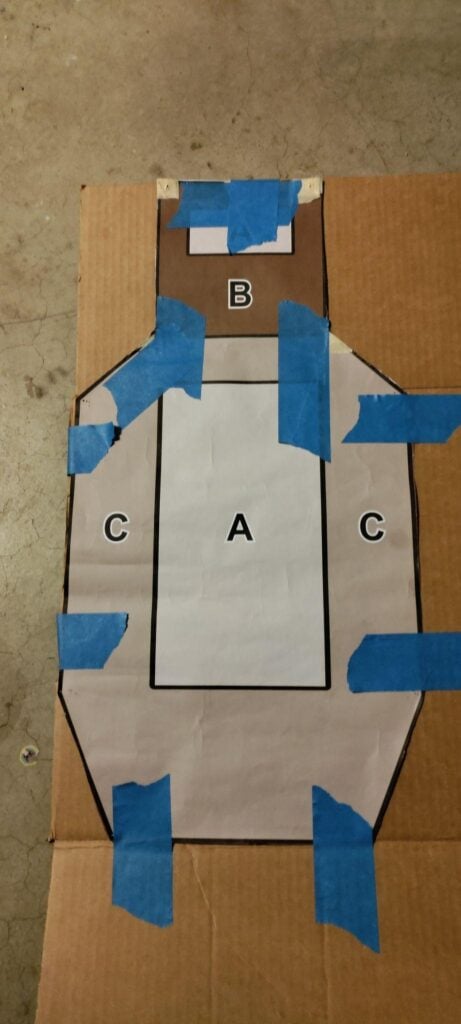
Top tip: put the head and one side of the silhouette at the edges of the cardboard to save time and effort. Here, you’ll see I have the head and one side on the edges, and the bottom of the C zone is along a crease, making it that much easier to cut away.
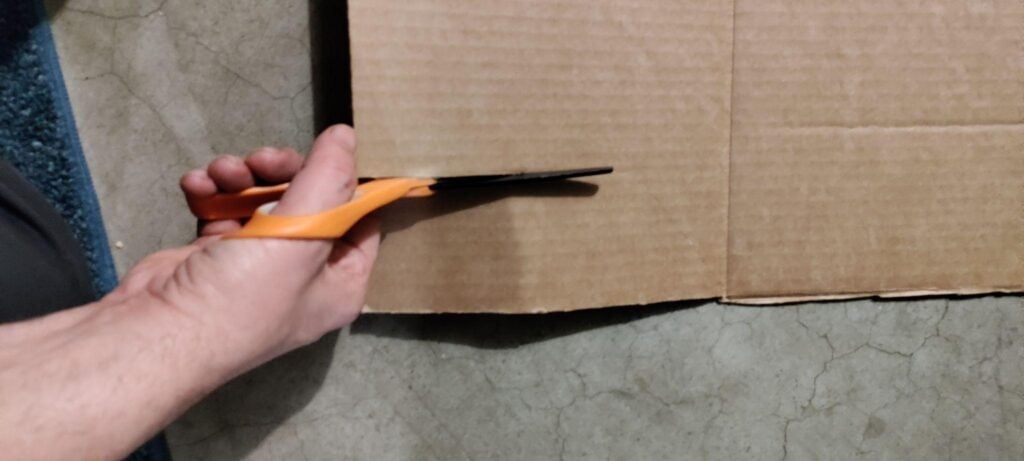
Using your straight edge as a cutting fence, cut around the template. Since I’ve done this enough times, I can do it by hand with no issues.
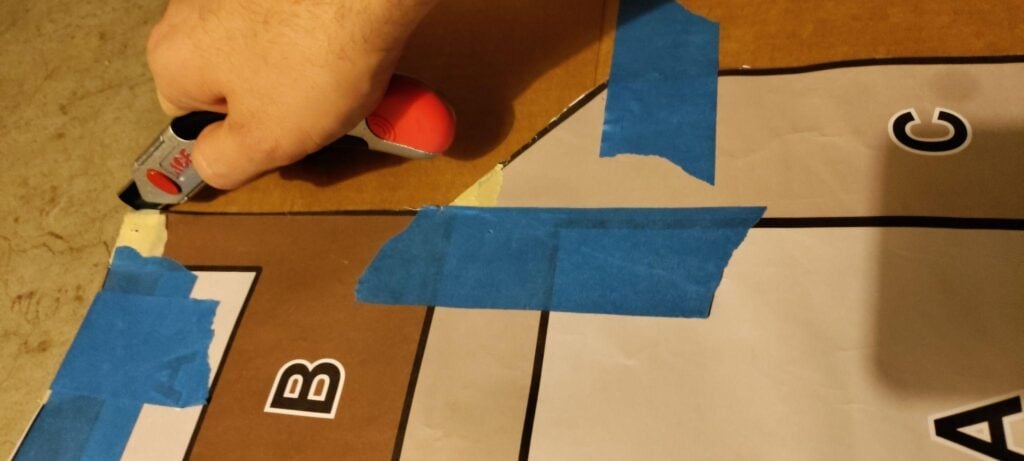 The best thing to do is trace the silhouette with a fine blade like a carpet knife or box cutter to make scoring cuts, take the template off, and then cut the target out along the scoring lines with scissors.
 Then, repeat the process with any more cardboard.
As to scoring zones, you can indent the cardboard using a pizza cutter or go a little lower tech.
For instance, the A Zone is the width of the head of the USPSA target. It starts just under the shoulders of the C zone and ends just above the bottom taper. You can easily just use masking tape so the A zone is inside it.
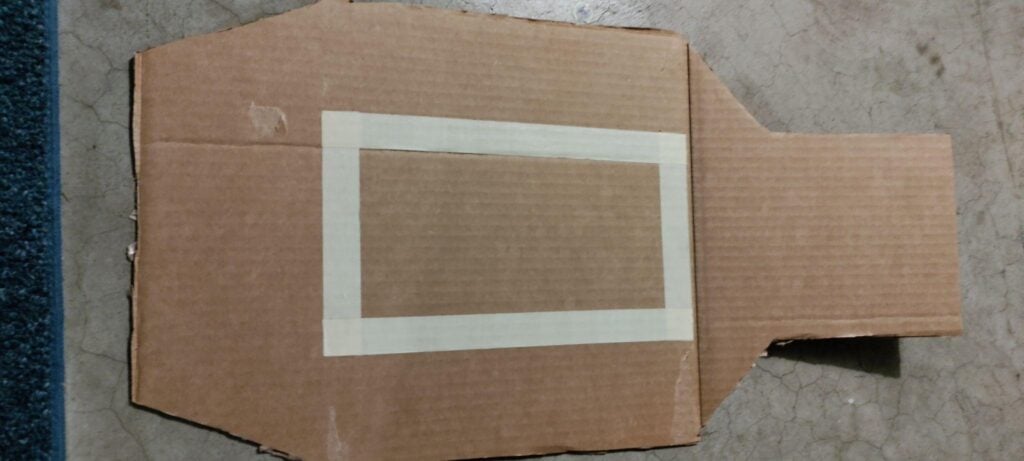 This also lets you maintain the scoring zone with masking tape and brown pasters or just more masking tape.
Scoring zones on IDPA targets are harder. Tracing around 4- and 8-inch paper plates for the -0 zones can work, or you can just put a B8 on the body since the 8-ring is 8 inches in diameter and B8s are cheap.
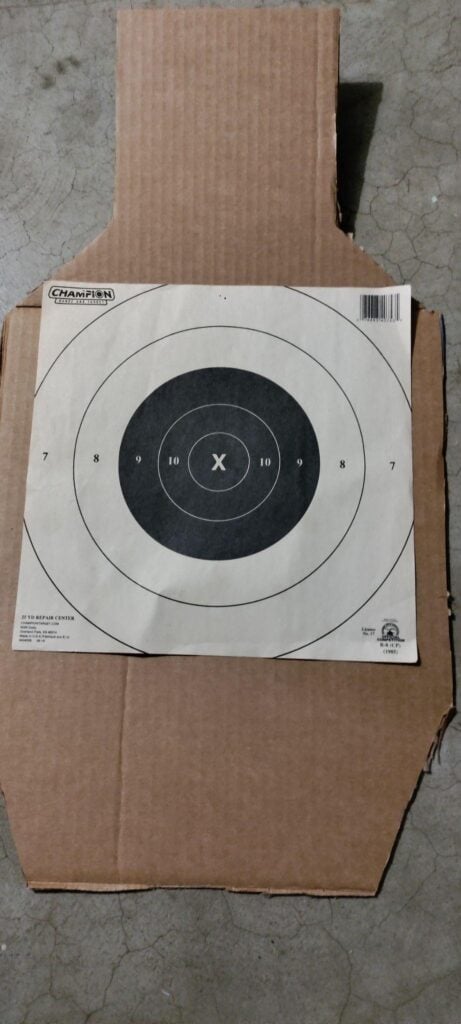
Taping, gluing, or stapling up B8s also gives you an ersatz bottle target, and – again – the C-zone/Down 1 is anatomically relevant as it’s about the normal size of the human torso. Since the black is anatomically relevant as well (the human heart fits inside the 9-ring, the human brain stem fits inside the 10-ring) that means you can put in meaningful work with very cheap materials.
Now, are these perfect C zones? No, but who cares? They’re more than close enough to do meaningful work, and all it costs you is a few minutes of time, a little effort, and a few cents’ worth of masking tape at the most.
Read the full article here


